
Even if you capture the best, Blue Ribbon prize winning image of your artwork, you will often be able to enhance it on the computer. Masterpieces can be improved and terrible pictures can often be saved; sometimes they can be even be made great.
It's likely you have a computer. If you are reading this offline, on your buddy Eugene's machine while he is playing Super Mario 64, or at the library - or if you simply have not yet acquired all the equipment to run your own "digital darkroom" at home - you may skip this page. If you are are almost all set up, but just need software, check out starter digital image editing programs such as Photoshop Elements. It doesn't have the Curves which we explore below but it does have Levels, which can be used to correct color.
Fixing up your photos digitally involves correcting things that went wrong at time of exposure as well as correcting problems that are inherent to the digital process. For example, the process of digitizing an image - scanning it in or taking the picture with a digital camera - often softens the picture. To bring it back to a sharp rendition of the original, we mask the unsharp effect. More on this later.
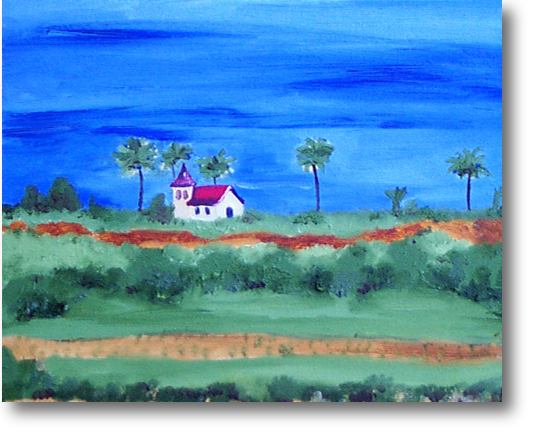 Before |
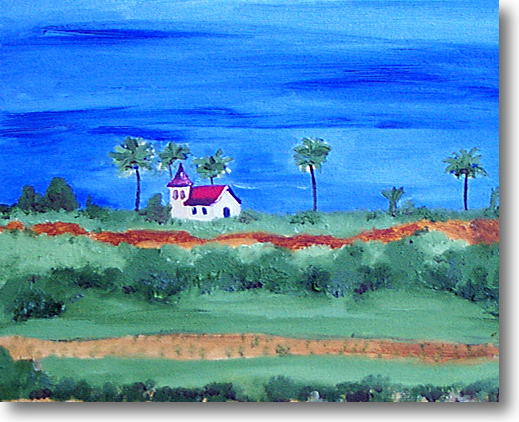 After |
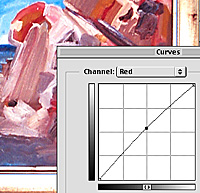
First step: open the image in your image editing software and go to your image color adjusting tool of choice. As mentioned earlier we will use the Curves tool in Photoshop.
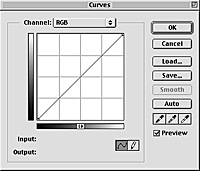 Pick a point right in the center of the curve line and pull it down a bit to darken the image.
  Now stare at the image until your eyes are about to bulge out (just kidding - kids, don't try this at home) and see if you can see any color imbalances. Is the image too red, green or blue? If so, go to the color channel menu on the top of the Curves control and select the color in question. Pick a point again and pull down.
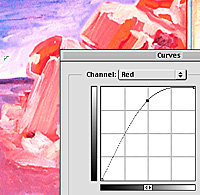
 You will rarely if ever need or want to pull the curve more than half a square; most images are close to being perfect and too dramatic of a change makes the image look fake.
As you drag your central point, go straight up or straight down - not toward a corner.
This is a funny way of saying sharpening. They have their reasons, those technical folks at Adobe. For now, though, we will just concern ourselves with the subtle use of their awesome tool and stop fussing over semantics.
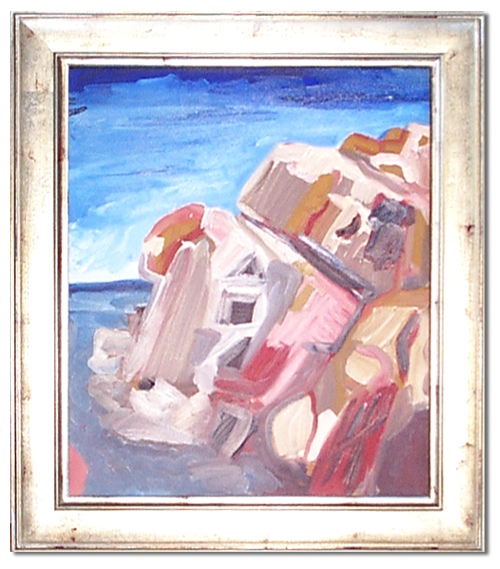
 There is one rule in using the Unsharp Mark filter: don't overdo it. A light touch is all that is needed. In this first example, pushing the filter to its maximum causes the image to get really sharp - sharp like a rusty saw blade. We want to avoid that.
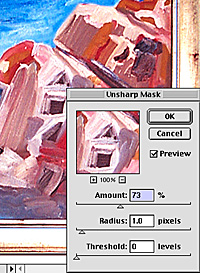 Simple solution: apply the mask just a bit. In this example, I am still going pretty extreme. But I couldn't help myself. It was not until I applied the filter effect and toggled back and forth between the before and after that I realized that my restraint (what little I had) was the right thing to do. A little of this filter goes a long way.
I reapplied the filter a second time after shrinking the image from its big version to the small version that you see below. It seems that any big transformations in the image editor beg for a bit of touch up.
|
Before |
 After |
As a final note, it is essential to your mental health and well-being to be fully aware of how differently various monitors display images. Be prepared to witness the transformation of your beautiful picture from a perfectly color-corrected work of art to a horrible, disgusting, embarrassing misrepresentation when you see it on someone else's computer. Someday, the Webster of the monitor world will successfully standardize the way we display photos on screens - and many people are trying this very second. However, for now, Macs display light and PCs display dark.
Just keep playing with your images until you get something you are happy with. Email it, print it, set it as your screensaver, or best of all, put it on the Web.
There you have it. You now know all you need to know to begin photographing your paintings. So put that paintbrush down and grab your camera.
1) How to Photograph Paintings - Introduction
2) Turn Off Your Flash
3) Up Against the Wall
4) Dealing with Frames
5) Dealing with Glass
6) Digital Fixing