
by Peter K Burian
Just like film cameras, digital cameras do not always make a perfect exposure. When the subject is light-toned (a snowy landscape, for example), the camera tends to underexpose. The image may be too dark. Conversely, if your subject is very dark-toned (a black cat, for example) the camera is likely to overexpose. The image will be too bright. These problems occur because the camera's light metering system is "fooled" by an unusually light-toned or dark-toned subject.

After taking a digital photo, check it on the LCD monitor in Playback mode. If the exposure (brightness) is not quite right, plan to re-shoot with different settings.
The most intuitive override is exposure compensation. Simply set a + level to make a brighter image. If you want to make a darker image, set a - (minus) level.
This feature is usually accessed with a [+/-] button or from the electronic menu. Available with nearly all digital cameras, exposure compensation works perfectly in Program (P) mode and in the semi-automatic Aperture Priority and Shutter Priority modes. However, exposure compensation may NOT operate in AUTO mode or the subject-specific Program modes: the Landscape, Portrait, Sports, etc.
We do not often take photos of black - or other very dark-toned - subjects. But when we do, the camera may make an image that's too bright; blacks may be gray instead of rich dark black. In that case, use a - (minus) exposure compensation when re-shooting, for a darker photo.
As a test, try taking some wide angle photos of a light-toned subject. For example, find a scene that includes a lot of bright snow, water or sky. You'll probably find that your images are underexposed: too dark.
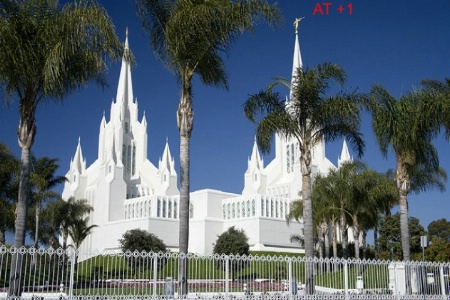
Set a +1 exposure compensation level. Take the same photos again. The new images will be brighter, hopefully close to perfect. That makes sense because the + exposure compensation level causes the camera to make a photo with more exposure.
Tip: Take care not to make images that are excessively bright. It's important to maintain some detail in the brightest areas: texture in snow, for example. If you find that a +1 level produces images that are excessively bright, try again. This time, set less compensation: +0.5 or +0.7, for example.
While you can fix some exposure errors with Photoshop or other software, it's best to get image brightness just right, in-camera. That will save time later and reduce the risk of damaging pixels. Naturally, you can also use exposure compensation as a creative tool: to make an image that’s not necessarily technically perfect but is more pleasing to the eye.

To learn more about photography, explore the photography classes offered here at BetterPhoto.